A nail art tutorial to create marble nail art is the focus of this Tuesday’s how-to segment from Ask the Pro Stylist. With a little practice and a lot of cleaning, you could easily make nail fashion at home with a few little nail art tips and tricks.
Welcome beauty lovers to How-to Tuesday. This week we turn the focus to nails with a nail art tutorial that creates marble nail art. I first came across the YouTube video featured in my Memorial Day nail fashion article for Examiner.com as I was researching patriotic nails. The young lady has many views and followers, not bad for a hobby funded by her father, however there is no mention of a beauty education or any training or licensing in the beauty field, quite typical for many beauty bloggers and vloggers out there.
I wanted to attempt the marble nail art Lacengi featured in her nail art tutorial video. The clip was clearly edited to leave out the mess designing nails like this at home creates, as well as particular advice not mentioned, but that is to be expected from a nonprofessional.
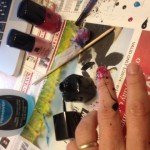
Marble Nail Art Tutorial Photo Property of Ask the Pro Stylist
I was licensed in New York State when beauty culture encompassed hair, skin and nails, now there are specific licenses for each. I prefer to do my own nails, even my short stubs, which recently all broke. And although my primary business is hair, I could do nails if I needed to, just not the intricate art work as I have been out of nail practice. I do know enough to bring a proper nail art tutorial to the readers. This site doesn’t support video, however, interested parties can follow along with my pictures and tips and refer back to Gia to see the video.
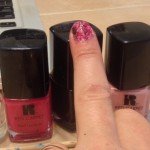
Marble Nail Art Tutorial Photo Property of Ask the Pro Stylist
Marble Nail Art Tutorial
- Protect your work surface with towels or newspaper.
- Gather supplies: Cotton or lint free pads, nail polish remover, base coat, nail polish, top coat, cuticle oil, orangewood stick.
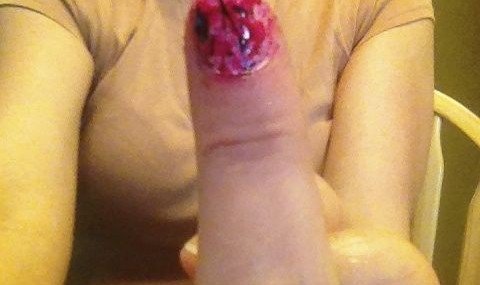
- For my nails pictured above I used NailTek Xtra as the base and topcoat because I am trying to strengthen them again after gel nail polish damage.
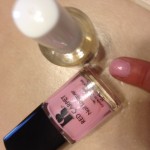
- I used two coats of Simply Love Your Nails (Pink) Nail Lacquer from Red Carpet Manicure.
- For the splatter design I used RCM’s Paparazzied and Black Stretch Limo.
- Dip the straw in the hot pink, or color of your choice, with your finger over one end and release a bit of air so the polish floats up. Drip excess polish back into the bottle (you only need a drop to marbleize). Place the straw (disposables are best, and use one for each color) over the nail, take a deep breath (do not suck) and blow the nail polish over the nail.
- Repeat for other color or colors.
- Apply topcoat (see above) and cuticle oil once dry or close to dry. Health nail tip: Using cuticle oil every day or every other day keeps the nails strong and the cuticles soft.
It took a few tries of my own nail art tutorial to get it right and it made a mess, even with a covered work place. The orange wood stick, cotton pad and polish remover fixed my disaster, but when it was dry, looked really cute, even on my short stub. I originally tried with a blue, but the polish was old, so always check the little jar on bottles for expiration dates and toss out old nail polish and makeup.
Marble Nail Art Tutorial Photo Property of Ask the Pro Stylist
Tune in next Tuesday when I cover another how-to topic similar to this week’s marble nail art tutorial. Happy Styling!
©Deirdre Haggerty, ALL RIGHTS RESERVED. No part of this article may be reproduced without prior written permission and consent from the author.


 A NY State licensed cosmetologist, Deirdre Haggerty has been actively involved in the hair and beauty industry on Long Island for over 25 years. Feel free to ask any question relating to hair care, beauty and skin care! Send Deirdre an email