Holiday Manicure: Snowflake Nail Designs
For a holiday manicure, try the snowflake nail designs featured in the Tuesday’s How-to from Ask the Pro Stylist. The holiday manicure was completed by one of my students, and I couldn’t be prouder of this visionary.
Happy Tuesday beautiful, and welcome to Ask the Pro Stylist’s How-to guide of the week! I enlisted the help of a friend and beauty colleague to assist the future professionals at Cactus Academy Paul Mitchell Partner School in a blogging/holiday manicure lesson. The winner was Alessia, whose step-by-step guide and photos are below.
Holiday Manicure:
-
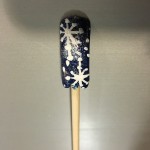
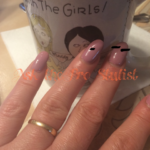
- Holiday Manicure: Snowflake Nail Designs by Alessia
-
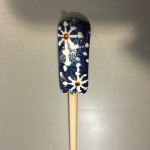
- Holiday Manicure: Snowflake Nail Designs by Alessia
-
- Holiday Manicure: Snowflake Nail Designs by Alessia
-
- Holiday Manicure: Snowflake Nail Designs by Alessia
-
- Holiday Manicure: Snowflake Nail Designs by Alessia
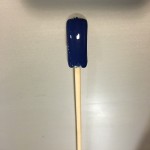
- Apply first coat of preferred polish
- Let that air dry, and then apply second coat of the same color.
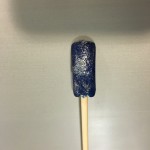
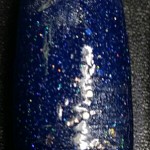
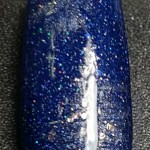
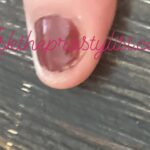
- Smear/tap on glitter
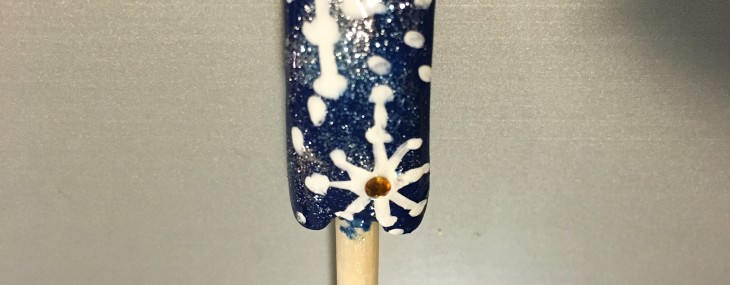
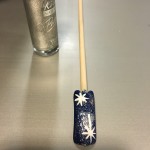
- Create your design (snowflake)
- Let dry
- Add some dots for more of an effect
- Add rhinestones in the middle of the snowflake
- Lastly, apply topcoat to complete your manicure
Shannon of Seriously Nails originated the holiday manicure, snowflake nail design for me. I didn’t provide the students with her steps, but instead wanted them to learn how to break down the instructions when doing hair, makeup, nails etc. We are in a world where they never know if their future art will be featured in a blog, magazine, or a class, and they need to learn how to document it. Shannon’s original guide follows along with her photos. You can see what a great job Alessia, (and all the students) did with this task.
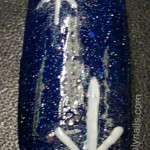
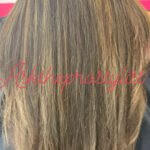
- Apply your favorite winter color. Add some depth by sponging on two silver areas where your stars will be.
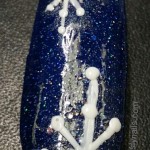
- Start at the tip of the nail and make large strips like a T, then add smaller stripes in the shape of a X. Do the same thing but up higher and smaller to give the perspective of closeness and distance.
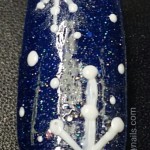
- Starting at the X shape, put dots on the ends of the lines. Continue making the dots in the same spot on the T. Then add dots at the end of the letter T.
- Place random size dots, in random places on the remaining part of the nail.
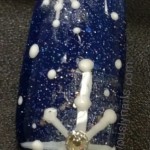
- Add a topcoat, and then while the topcoat is wet, place a crystal in the center of the large snowflake.
**Remember not to topcoat the crystal, it will loose its shine.
-
- Holiday Manicure: Snowflake Nail Designs by Shannon of Seriously Nails
-
- Holiday Manicure: Snowflake Nail Designs by Shannon of Seriously Nails
-
- Holiday Manicure: Snowflake Nail Designs by Shannon of Seriously Nails
-
- Holiday Manicure: Snowflake Nail Designs by Shannon of Seriously Nails
-
- Holiday Manicure: Snowflake Nail Designs by Shannon of Seriously Nails
-
- Holiday Manicure: Snowflake Nail Designs by Shannon of Seriously Nails
Visit next Tuesday for more step-by-step guides similar to this week’s holiday manicure. Until then, happy styling!
©Deirdre Haggerty, ALL RIGHTS RESERVED. No part of this article may be reproduced without prior written permission and consent from the author.

 A writer, author, NY State licensed cosmetologist, beauty educator and Executive Director, Deirdre Haggerty has been actively involved in the hair and beauty industry in New York for over 30 years. Feel free to ask any question relating to hair care, beauty and skincare! Send Deirdre an email


You must be logged in to post a comment.